
Discover the ultimate guide to building your own container house in Australia. This comprehensive article explores the innovative 20-foot customized double-wing expansion room, providing step-by-step instructions, expert tips, and real-world applications. Learn how to create a sustainable, affordable, and stylish home using shipping containers, with detailed insights into materials, construction techniques, and customization options.
Building your own container house has become an increasingly popular trend in Australia, offering an affordable, sustainable, and unique housing solution. With the rising costs of traditional construction and growing environmental consciousness, more Australians are turning to shipping containers as viable building materials. This comprehensive guide will walk you through the process of building a container house yourself, with special focus on an innovative product that’s revolutionizing the industry: the 20-foot customized double-wing expansion room.
Container houses are not just economical; they’re also incredibly versatile, durable, and can be customized to suit various needs and aesthetics. Whether you’re looking for a primary residence, a holiday home, a guest house, or even a commercial space, container architecture offers endless possibilities. In this guide, we’ll explore everything you need to know about building your own container house, from planning and design to construction and finishing touches.
Understanding Container Housing: The Basics
Before diving into the construction process, it’s essential to understand what container housing entails and why it has gained such popularity in Australia and around the world. Container houses are structures built using shipping containers as the primary building blocks. These containers, originally designed for transporting goods across oceans, have been repurposed as architectural elements due to their strength, durability, and modular nature.
The most common container sizes used in housing are 20-foot and 40-foot containers. However, innovative designs like the 20-foot customized double-wing expansion room have taken this concept to the next level, offering expandable spaces that transform from compact units into spacious living areas.
Why Choose a Container House?
Container houses offer numerous advantages over traditional construction methods, making them an attractive option for DIY enthusiasts and professional builders alike:
- Cost-effectiveness: Container houses can be significantly cheaper than traditional homes, with savings of up to 30-40% on construction costs.
- Sustainability: Repurposing shipping containers reduces waste and the environmental impact of construction.
- Speed of construction: Container houses can be built in a fraction of the time required for traditional homes.
- Durability: Shipping containers are designed to withstand harsh conditions at sea, making them extremely durable as housing structures.
- Portability: Container houses can be relocated if necessary, offering flexibility that traditional homes cannot match.
- Customization: Containers can be modified and combined in countless ways to create unique living spaces.
Introducing the 20-Foot Customized Double-Wing Expansion Room
While traditional container houses offer many benefits, the innovative 20-foot customized double-wing expansion room takes container living to a new level. This revolutionary product combines the advantages of container construction with expandable design, creating a versatile and spacious living solution.
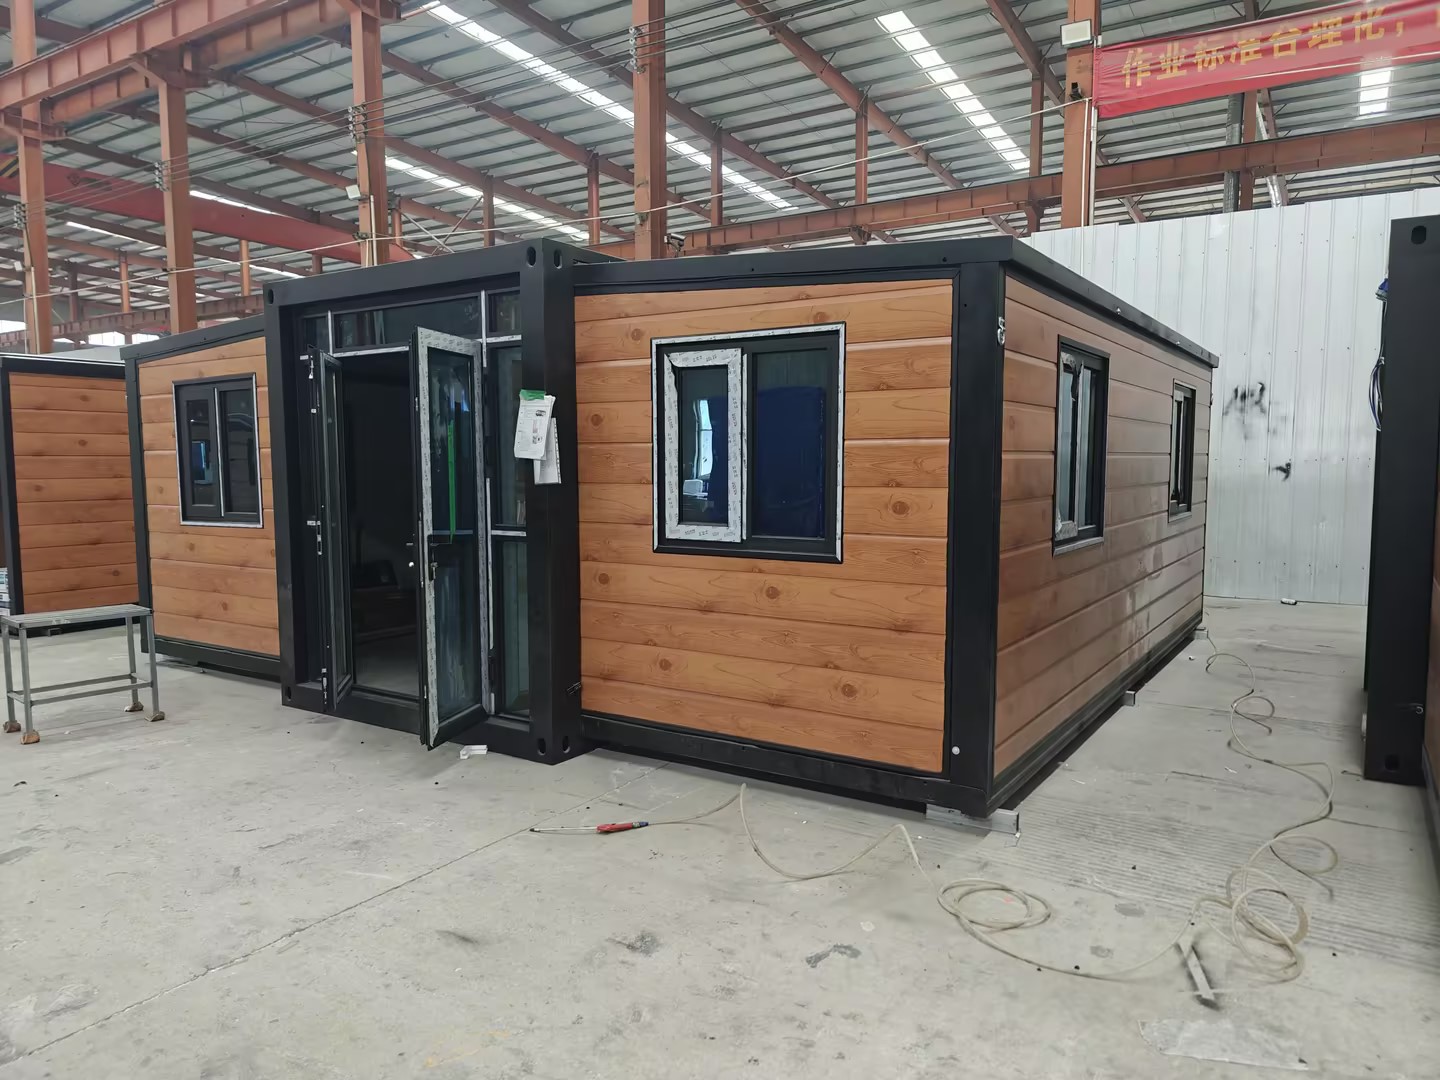
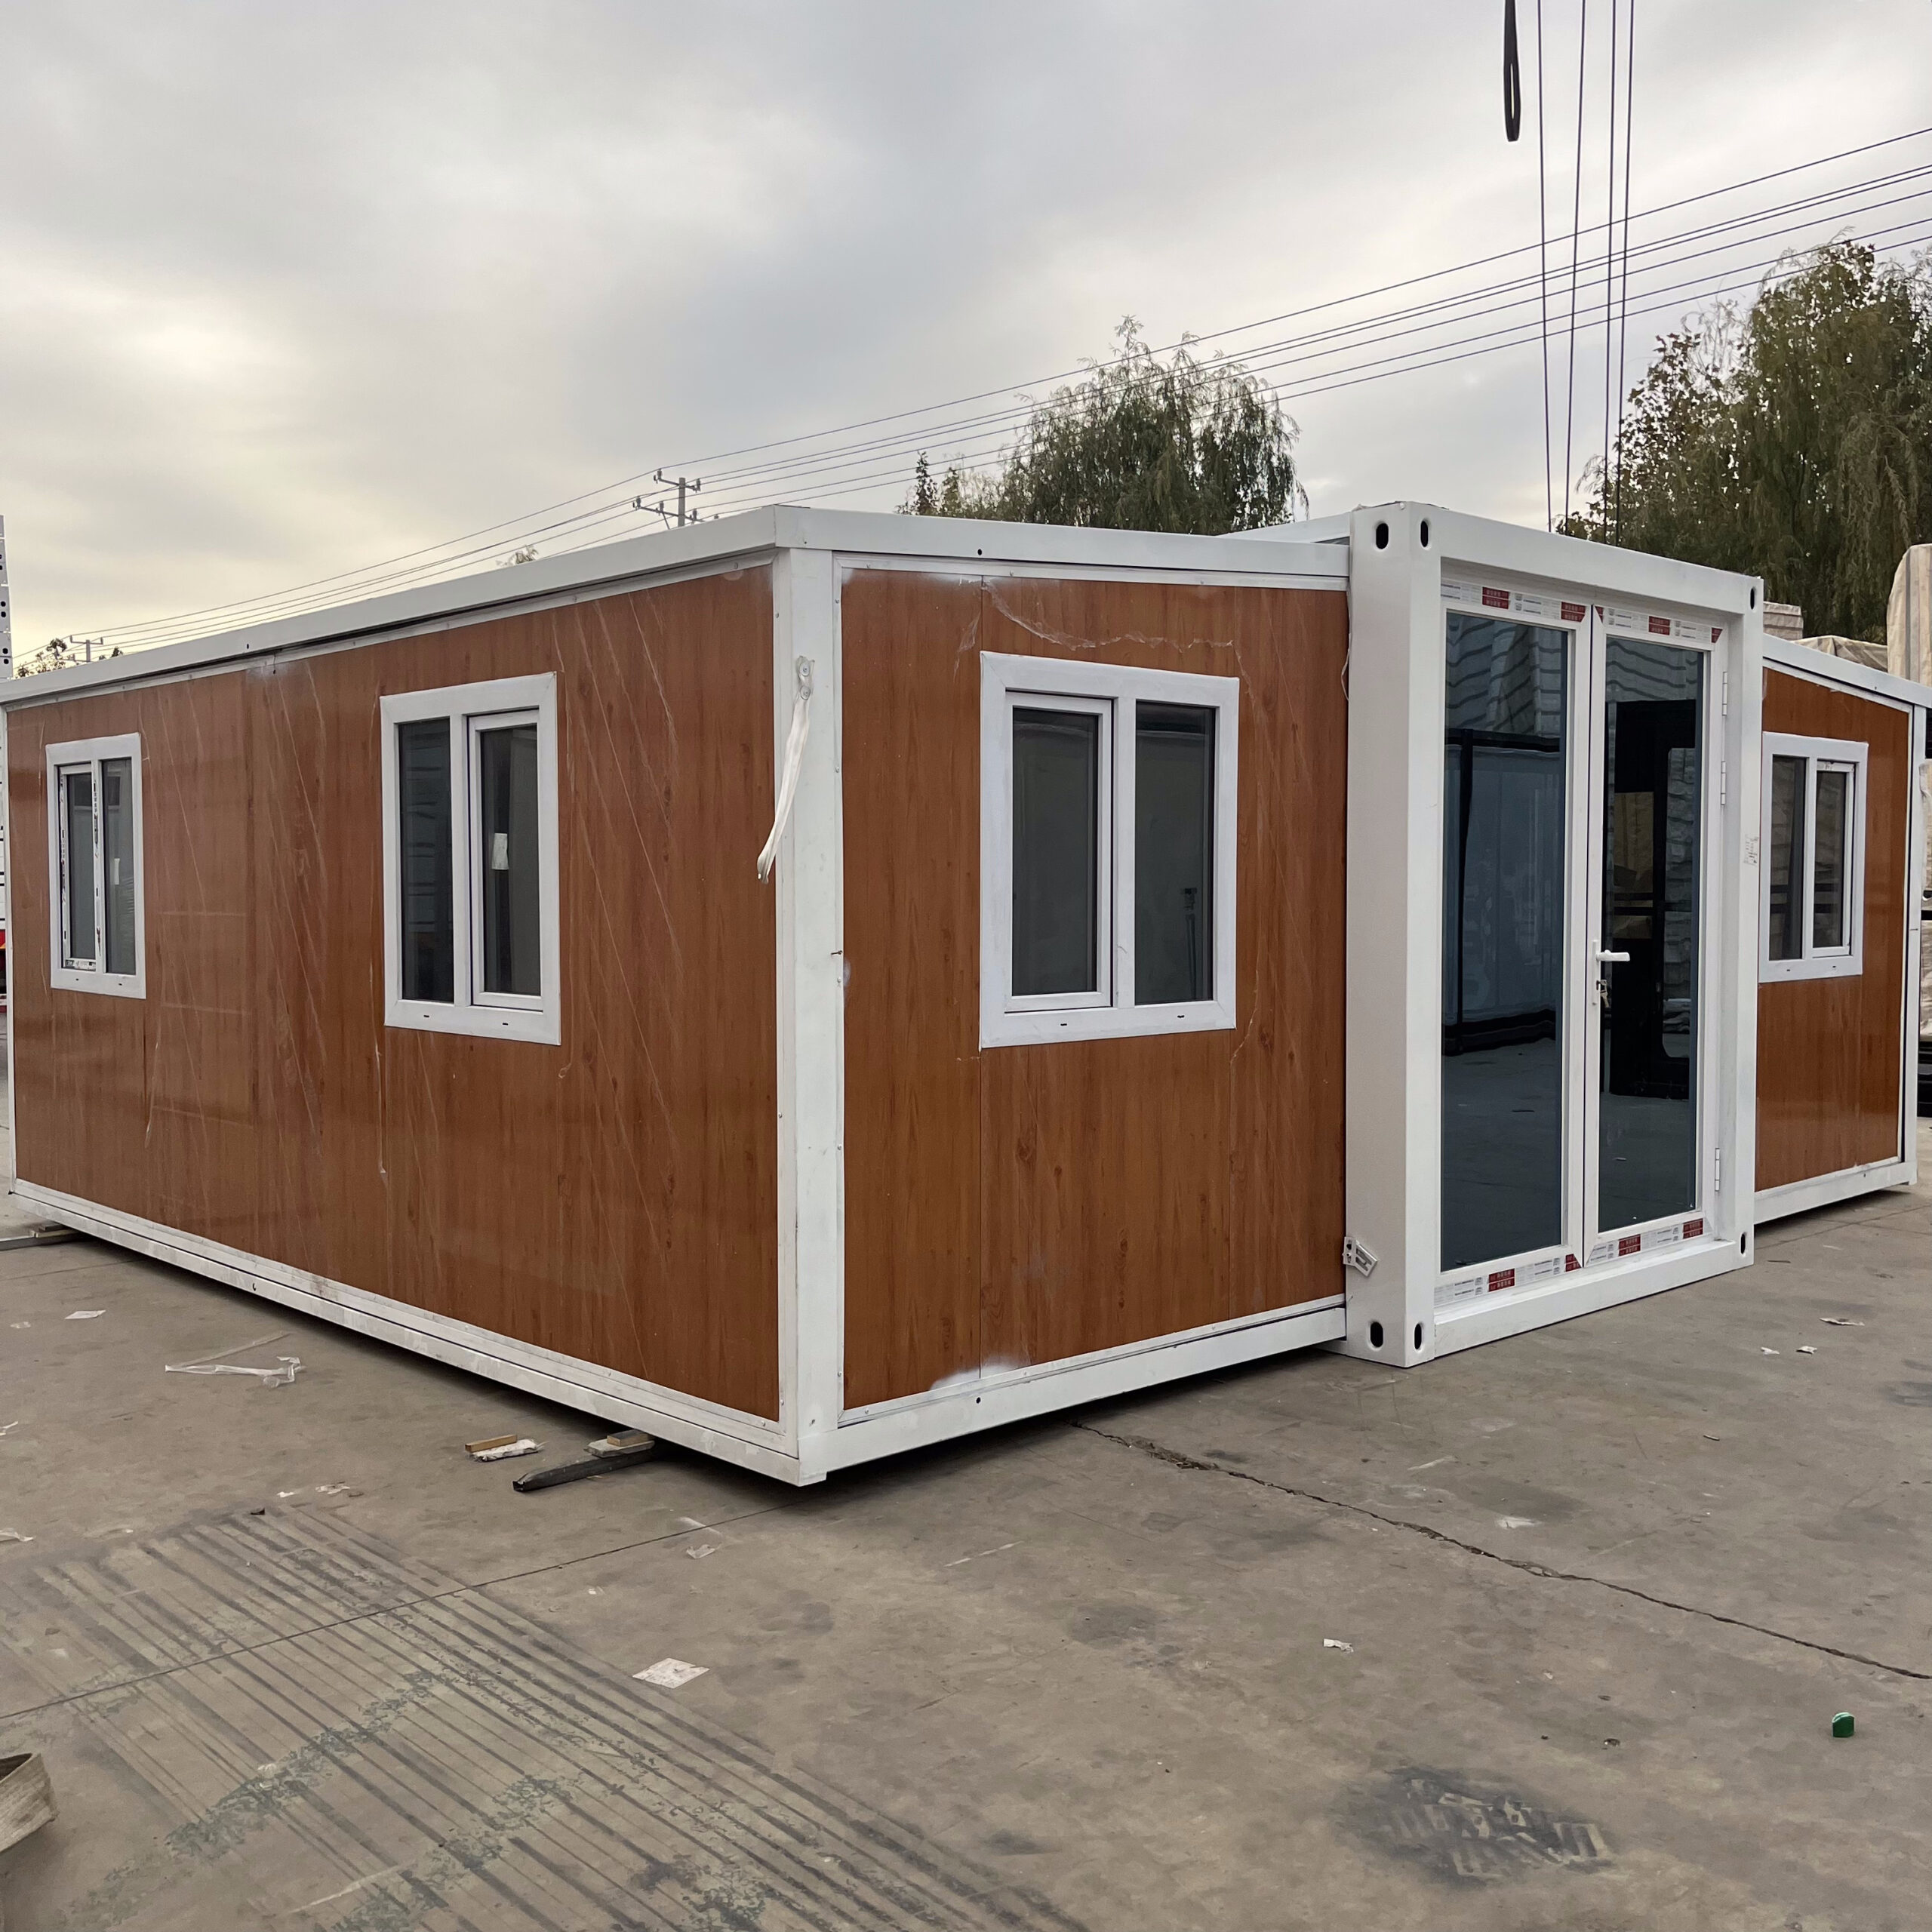
The double-wing expansion room gets its name from its unique design, which features two “wing-like” structures on either side that can be folded in for transport and unfolded to create additional living space. This ingenious design allows for easy transportation while providing up to 70-80% more usable space when deployed.
Let’s take a closer look at the features and specifications of this innovative product:
Core Features of the Double-Wing Expansion Room
1. Space Transformation
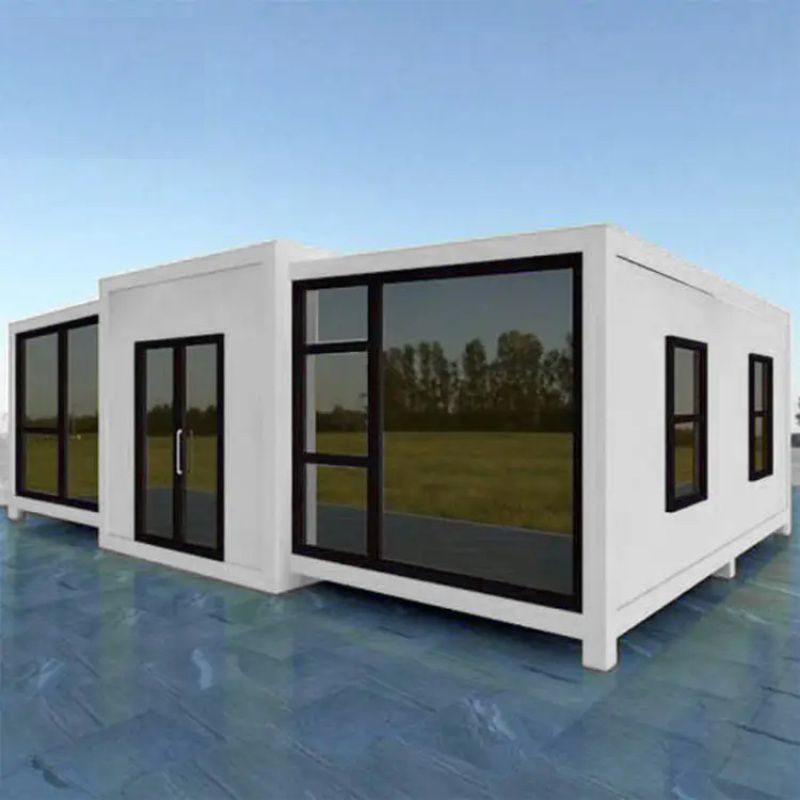
The most remarkable feature of the double-wing expansion room is its ability to transform from a compact container to a spacious living area. When folded for transport, the unit maintains standard container dimensions, making it easy to ship and handle. Once on-site, the wings can be unfolded to create a significantly larger living space.
Specifications:
- Expanded dimensions: W6340 × L5900 × H2480mm
- Folded dimensions: W2200 × L5900 × H2480mm
- Space increase: 70-80% more usable area when expanded
2. Structural Excellence
The double-wing expansion room is built with a high-strength structural frame, typically using hot-dip galvanized steel or carbon fiber composite materials. This ensures durability, stability, and longevity, even in challenging environmental conditions.
The standard black frame not only provides structural integrity but also gives the unit a modern, industrial aesthetic that can be customized to suit various design preferences.
3. Advanced Materials and Construction
The construction of the double-wing expansion room incorporates advanced materials and techniques to ensure optimal performance:
- Frame: Light steel fully galvanized skeleton for corrosion resistance and strength
- Insulation: High-quality insulation materials such as polyurethane or rock wool for thermal efficiency
- Waterproofing: Seamless construction techniques to prevent water infiltration
- Windows and doors: Hollow broken bridge aluminum with Low-E glass for energy efficiency
4. Factory Prefabrication
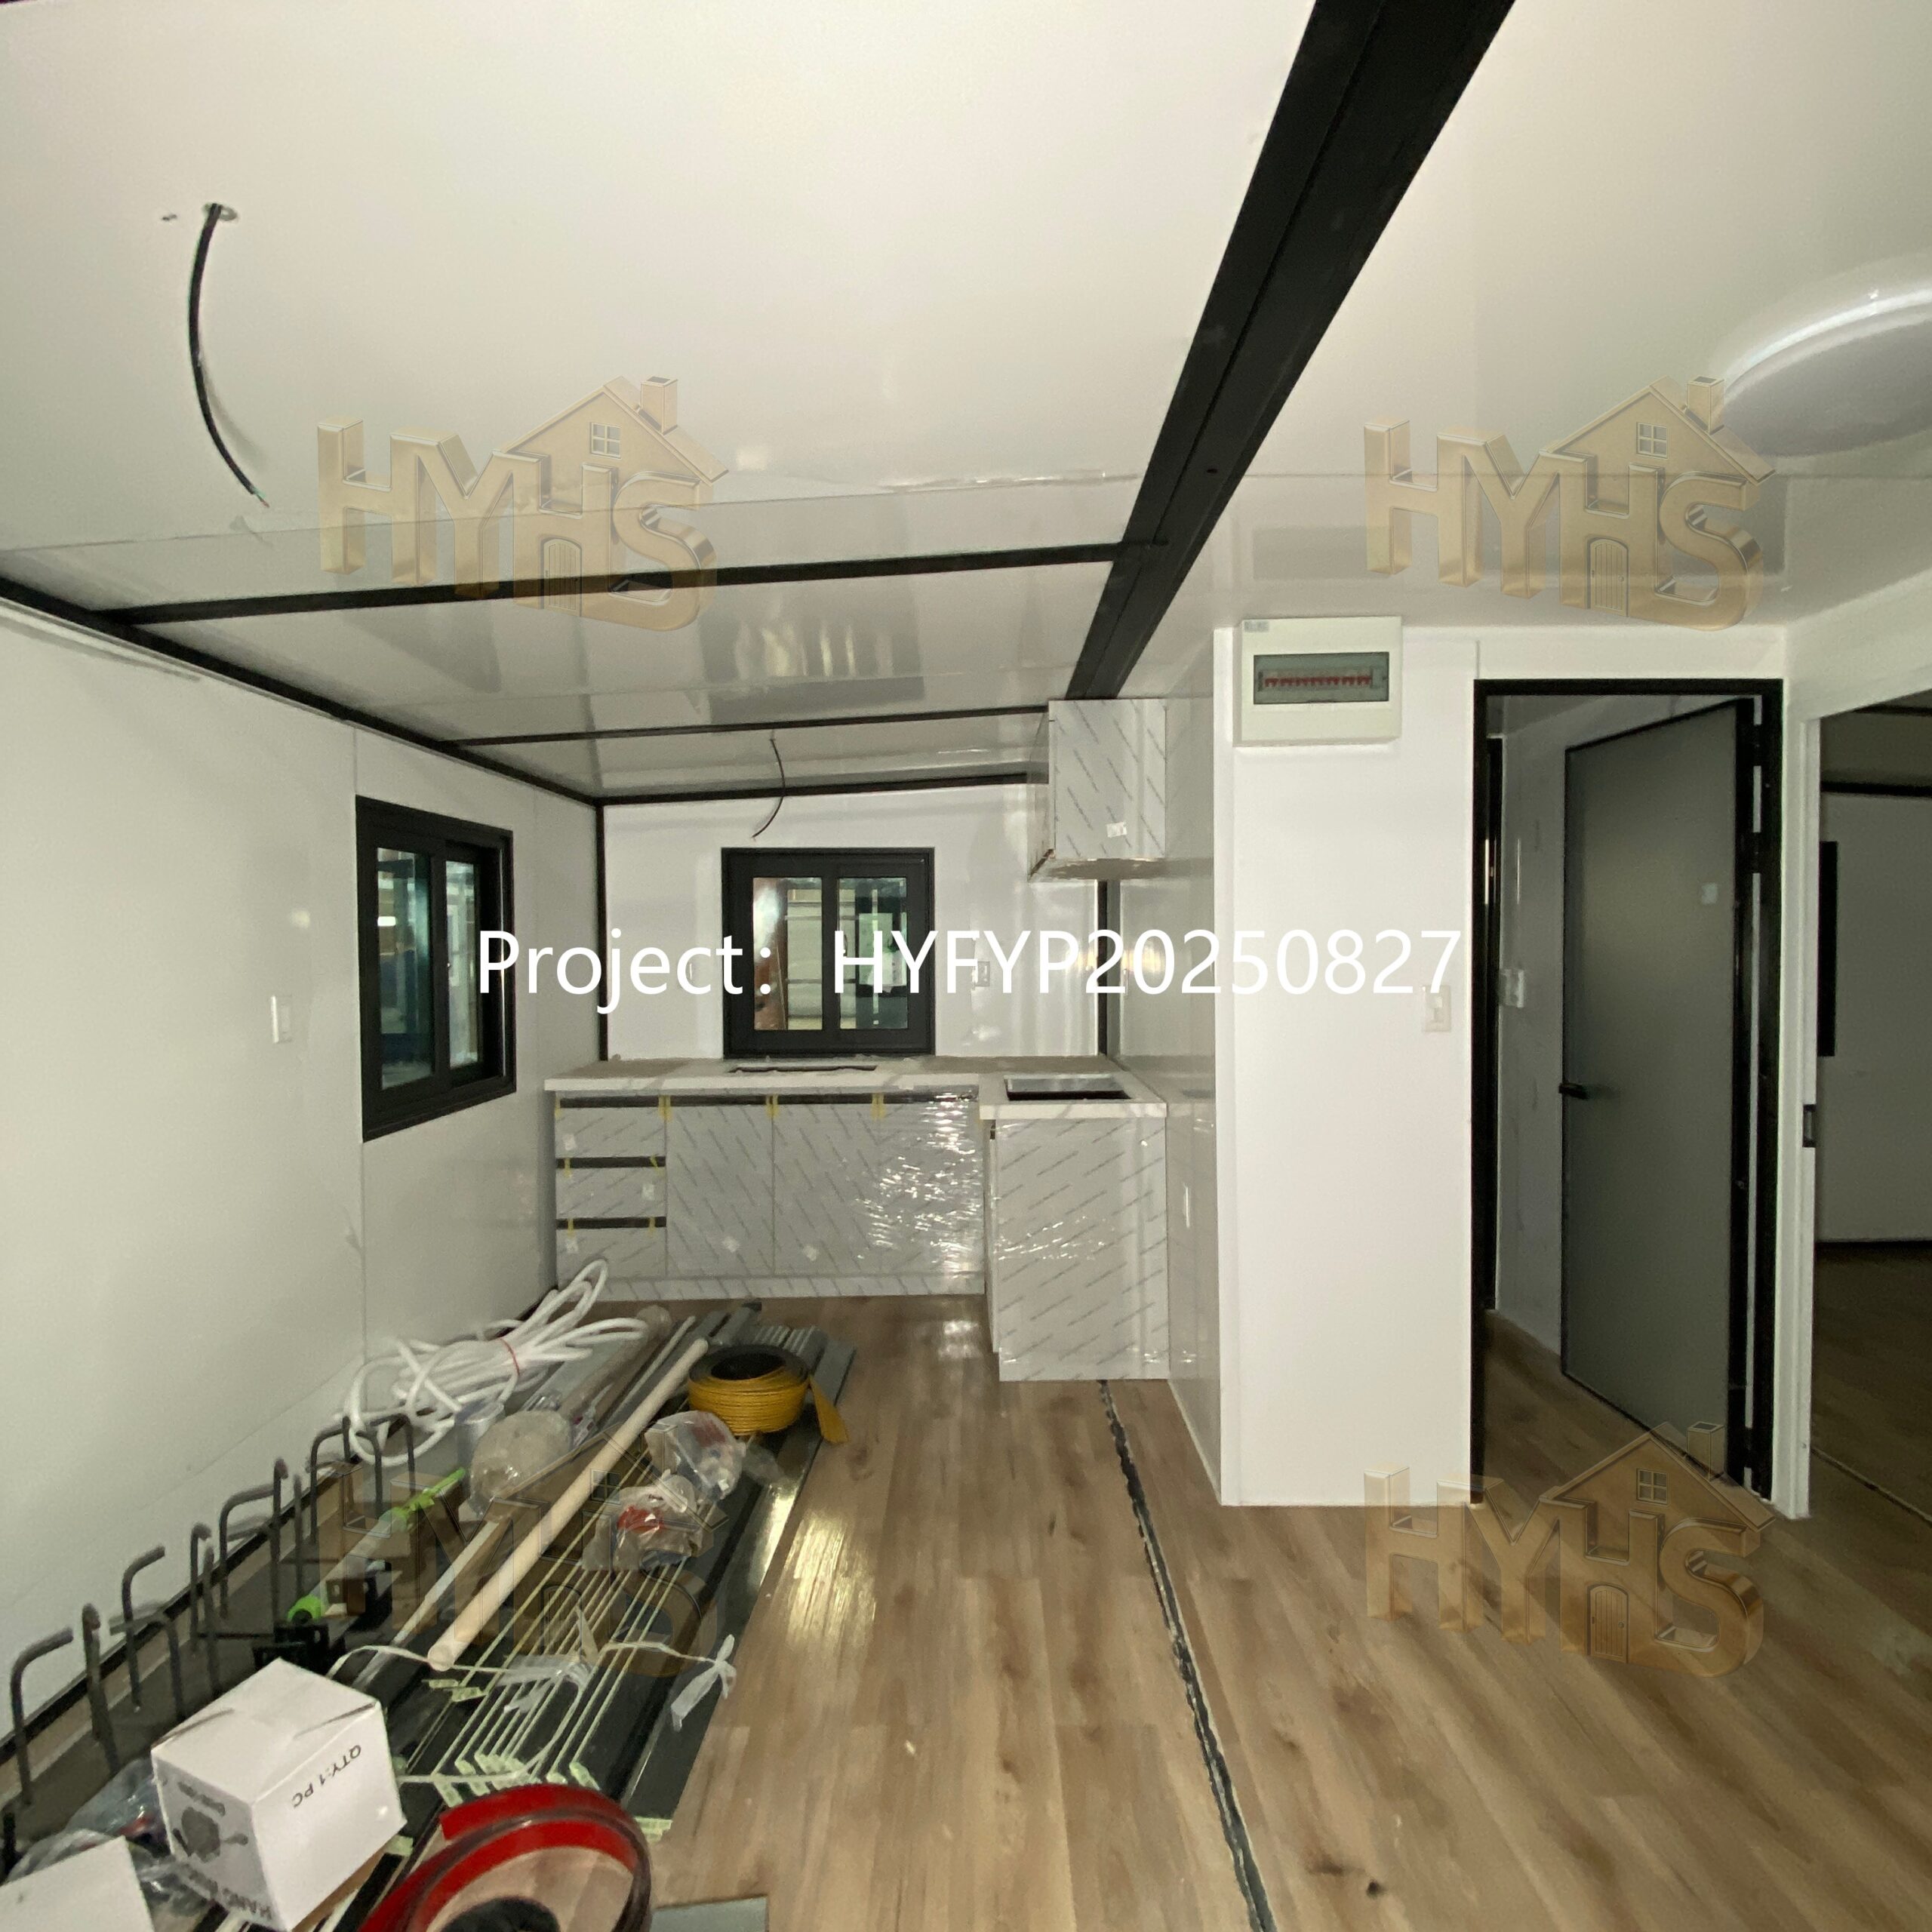
One of the key advantages of the double-wing expansion room is its high degree of factory prefabrication. Approximately 85% of the construction work is completed in the factory, including:
- Installation of electrical and plumbing systems
- Kitchen and bathroom fixtures
- Windows and doors
- Interior finishes
This level of prefabrication significantly reduces on-site construction time and ensures consistent quality control.
How to Build a Container House Yourself: Step-by-Step Guide
Now that we’ve introduced the innovative double-wing expansion room, let’s dive into the practical aspects of building your own container house. This guide will walk you through the entire process, from planning to completion.
Step 1: Planning and Design
The planning stage is arguably the most critical phase of building a container house. Thorough planning will save you time, money, and headaches down the road.
Assessing Your Needs
Before you start designing, take some time to assess your needs and requirements:
- How many people will be living in the house?
- What rooms do you need (bedrooms, bathrooms, kitchen, living area, etc.)?
- What is your budget?
- Where will the house be located?
- Are there any specific requirements or restrictions in your area?
For those considering the double-wing expansion room, think about how the expandable feature can meet your needs. The ability to expand the living space can be particularly useful for creating separate areas for different activities or accommodating guests.
Choosing the Right Container
When selecting containers for your project, consider the following factors:
- Size: 20-foot containers are easier to transport and handle, while 40-foot containers offer more space. The double-wing expansion room typically uses a 20-foot container as its base.
- Condition: New containers are more expensive but in perfect condition. Used containers are more affordable but may require repairs.
- Type: Standard containers are most common, but high-cube containers offer extra height, which can be beneficial for creating loft spaces.
Creating Your Design
Once you have a clear understanding of your needs and have selected your containers, it’s time to create your design. You can either work with an architect or designer or use online tools to create your own plans.
When designing your container house, consider the following:
- How the containers will be arranged (stacked, side-by-side, at angles, etc.)
- Where to cut openings for doors and windows
- How to connect multiple containers if using more than one
- Insulation and ventilation strategies
- Plumbing and electrical layouts
For the double-wing expansion room, the design process is simplified as the expandable mechanism is pre-engineered. However, you still need to plan the interior layout, finishes, and any customizations you want to incorporate.
Step 2: Legal Considerations and Permits
Before you start construction, it’s essential to understand and comply with all legal requirements in your area. This includes:
- Building codes: Ensure your design complies with local building codes and regulations.
- Zoning laws: Check if container houses are permitted in your area and if there are any restrictions.
- Permits: Obtain all necessary permits before starting construction.
- Homeowners association (HOA) rules: If you’re in an HOA community, check their regulations regarding container houses.
The double-wing expansion room, as a modular and prefabricated unit, often has an advantage in the permitting process as it’s designed to meet or exceed building code requirements. However, it’s still essential to check local regulations before proceeding.
Step 3: Site Preparation
Proper site preparation is crucial for the longevity and stability of your container house. The specific requirements will depend on your location, soil conditions, and local building codes, but generally include:
Land Survey
Conduct a land survey to identify boundaries, topography, and any potential issues that might affect construction.
Soil Testing
Test the soil to determine its bearing capacity and suitability for supporting your container house. This information will help you design the appropriate foundation.
Foundation Design
Container houses require less substantial foundations than traditional homes, but a proper foundation is still essential. Options include:
- Concrete slab: Provides a solid, level base and can incorporate radiant heating.
- Pier foundation: Concrete piers or footings that support the container at specific points.
- Strip foundation: Concrete strips that support the container along its length.
- Helical piles: Screw-like piles that are driven into the ground, ideal for uneven terrain.
One of the advantages of the double-wing expansion room is that it can often be installed on simple foundations or even adjustable supports, reducing site preparation time and cost.
Utility Connections
Plan for utility connections including water, electricity, sewage, and any other services you’ll need. This may involve:
- Bringing utilities to the site
- Installing septic systems or connecting to municipal sewage
- Setting up water storage or connection to municipal water
- Planning for renewable energy sources like solar panels
Step 4: Acquiring and Preparing Containers
Once your site is prepared and permits are in order, it’s time to acquire and prepare your containers.
Sourcing Containers
You can source containers from:
- Shipping companies and container depots
- Specialized container retailers
- Online marketplaces
- Directly from manufacturers (for new containers)
For the double-wing expansion room, you’ll typically purchase the complete unit from a manufacturer or dealer who specializes in these innovative structures.
Inspecting Containers
Before purchasing, thoroughly inspect each container for:
- Structural integrity (no major dents or damage)
- Rust or corrosion
- Watertightness
- Floor condition
- Doors and locking mechanisms
Preparing Containers for Construction
Once you have your containers, prepare them for construction by:
- Cleaning thoroughly inside and out
- Removing any unwanted interior elements
- Treating rust and corrosion
- Applying primer and paint as needed
The double-wing expansion room comes pre-finished from the factory, so these preparation steps are typically handled by the manufacturer.
Step 5: Foundation Installation
With the site prepared and containers acquired, it’s time to install the foundation. This process will vary depending on the type of foundation you’ve chosen:
Concrete Slab Foundation
- Excavate the area to the required depth
- Install formwork to define the slab edges
- Add a layer of gravel for drainage
- Install reinforcement (rebar or mesh)
- Pour concrete and level it
- Allow concrete to cure properly (typically 7-28 days)
Pier Foundation
- Mark the locations for each pier
- Excavate holes for the piers
- Install formwork if needed
- Add reinforcement
- Pour concrete
- Allow to cure
- Install steel or concrete caps on each pier
Placing Containers on Foundation
Once the foundation is ready, you’ll need to place the containers on it. This typically requires:
- Renting a crane or forklift
- Securing professional help if you’re not experienced with heavy equipment
- Carefully positioning each container according to your design
- Leveling and securing containers to the foundation
The double-wing expansion room is designed for easy placement, with standard lifting points that make it straightforward to position with a crane.
Step 6: Structural Modifications
With the containers in place, you can begin structural modifications to create your desired living space. This is one of the most technical aspects of building a container house and may require professional assistance.
Cutting Openings
Cutting openings for doors, windows, and connections between containers requires precision and the right tools:
- Plasma cutters or angle grinders for cutting steel
- Measuring and marking tools for accuracy
- Safety equipment including eye protection, gloves, and respirators
When cutting openings:
- Mark the opening carefully
- Reinforce the area around the opening if necessary
- Cut the opening using appropriate tools
- Finish the edges to prevent rust and sharp edges
Reinforcement
When you cut openings in a container, you’re removing structural elements, so reinforcement is often necessary:
- Adding steel framing around large openings
- Installing structural beams where needed
- Ensuring the container maintains its structural integrity
Connecting Multiple Containers
If you’re using multiple containers, you’ll need to connect them securely:
- Welding containers together for a permanent connection
- Bolting containers together if you want the option to separate them later
- Sealing the connections to prevent water infiltration
The double-wing expansion room simplifies many of these structural modifications as the expandable mechanism is pre-engineered and the structural elements are designed to accommodate the transformation from compact to expanded state.
Step 7: Insulation and Climate Control
Proper insulation is crucial for container houses, as steel conducts heat and cold efficiently. Without adequate insulation, your container house will be extremely hot in summer and cold in winter.
Insulation Options
Several insulation options are suitable for container houses:
- Spray foam insulation: Provides excellent coverage and seals air leaks but can be expensive.
- Rigid foam boards: Good insulating value and relatively easy to install.
- Blanket insulation (batts or rolls): Traditional fiberglass or mineral wool insulation, affordable but requires careful installation.
- Insulated panels: Prefabricated panels that combine insulation and structural elements.
The double-wing expansion room typically comes with high-quality insulation such as polyurethane or rock wool, ensuring excellent thermal performance without additional work.
Installation Process
The insulation installation process generally involves:
- Cleaning and preparing the container interior
- Installing furring strips or framing to create a cavity for insulation
- Installing insulation material according to manufacturer’s instructions
- Adding a vapor barrier to prevent moisture issues
- Installing interior wall covering over the insulation
Climate Control Systems
In addition to insulation, you’ll need to plan for climate control systems:
- Heating: Options include radiant heating, heat pumps, wood stoves, or electric heaters.
- Cooling: Air conditioning, evaporative coolers, or passive cooling design strategies.
- Ventilation: Mechanical ventilation systems, exhaust fans, and strategically placed windows.
Step 8: Plumbing and Electrical Systems
Installing plumbing and electrical systems in a container house requires careful planning and professional expertise. This is one area where it’s often best to hire licensed professionals, especially for complex installations.
Plumbing Installation
Plumbing installation typically involves:
- Planning the layout of pipes and fixtures
- Running water supply lines (usually through the floor or walls)
- Installing drain pipes and vents
- Connecting to the main water supply and sewage system
- Installing fixtures (sinks, toilets, showers, etc.)
One of the advantages of the double-wing expansion room is that the plumbing is often pre-installed at the factory, significantly reducing on-site work.
Electrical Installation
Electrical installation includes:
- Planning the electrical layout and circuit design
- Running electrical wiring through the walls and ceiling
- Installing electrical boxes for outlets, switches, and fixtures
- Connecting to the main power supply or setting up an alternative energy system
- Installing outlets, switches, and light fixtures
Electrical work should always be done by a licensed electrician to ensure safety and compliance with local codes.
Step 9: Interior Finishing
With the structural, insulation, plumbing, and electrical work complete, it’s time to focus on the interior finishing that will make your container house feel like a home.
Wall Coverings
Options for interior wall coverings include:
- Drywall: Traditional and versatile, can be painted or textured.
- Wood paneling: Adds warmth and a natural aesthetic.
- Metal panels: Maintains the industrial look of the container.
- Shiplap or other decorative wood: Creates visual interest and texture.
Flooring
Flooring options for container houses include:
- Laminate or vinyl flooring: Durable, affordable, and easy to install.
- Engineered wood: Provides the look of hardwood with better stability.
- Tile: Excellent for bathrooms and kitchens.
- Concrete: Maintains the industrial aesthetic and is extremely durable.
Ceiling Treatments
Ceiling options include:
- Exposed container ceiling: Maintains the industrial look.
- Drywall ceiling: Creates a more traditional look.
- Wood beams or paneling: Adds warmth and visual interest.
- Drop ceiling: Allows for easy access to utilities and can incorporate lighting.
Kitchen and Bathroom Installation
Installing kitchens and bathrooms is a significant part of the finishing process:
- Kitchen: Cabinets, countertops, appliances, sink, and fixtures.
- Bathroom: Vanity, toilet, shower or bathtub, and fixtures.
The double-wing expansion room often comes with pre-installed kitchen and bathroom modules, making this step much simpler and faster.

Step 10: Exterior Finishing
The exterior finishing of your container house not only affects its appearance but also its durability and weather resistance.
Exterior Cladding
Options for exterior cladding include:
- Paint: The most basic option, but can be customized with colors and designs.
- Wood
本文由人工智能技术生成,基于公开技术资料和厂商官方信息整合撰写,以确保信息的时效性与客观性。我们建议您将所有信息作为决策参考,并最终以各云厂商官方页面的最新公告为准。